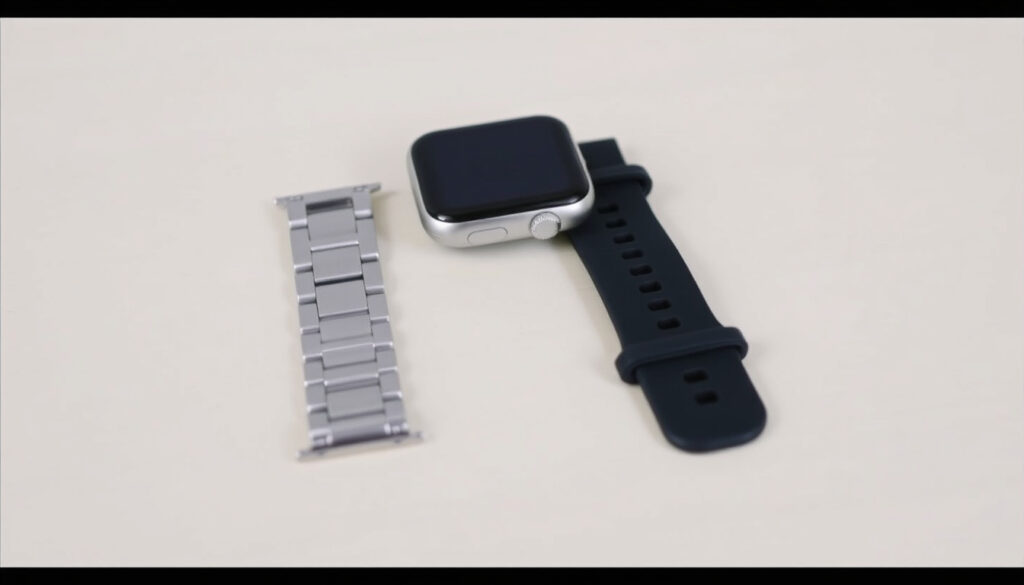
How to Change Apple Watch Band: Step-by-Step Guide from Apple
There’s a small, satisfying ritual to swapping an Apple Watch band — that precise click when the new strap seats into place. But if you’ve ever wrestled with a stuck band at 7 a.m. or wondered whether daily changes could wear out the mechanism, you’re not alone. Apple’s official guidance is refreshingly straightforward, and this guide walks through the entire process — from the correct way to hold your watch, to what to do if a band refuses to budge, to whether swapping straps every day is actually a good idea.
Release button location: underside of the watch near the band slot · Official guidance source: Apple Support (tier-1) · Typical band replacement time: under 30 seconds per band
Confirmed facts
Place the watch face down on a soft, clean surface before removing or installing a band (Apple Support).
The Link Bracelet requires sliding the release tabs — not the band release button — to remove links or detach the band (Apple Support).
Never force a band into the slot — if it doesn’t slide easily, something is wrong (Apple Support).
Third-party bands may lack the precise cutout that aligns with Apple’s release mechanism — check compatibility before forcing (Apple Support).
How to Change Your Apple Watch Band — Step by Step
Apple’s official process is designed to be tool-free and quick, but the details matter more than most people realize. The entire procedure takes under 30 seconds per band once you know exactly where to press and how to slide.
Start by placing your watch face down on a clean, soft surface to prevent scratches. Locate the band release button on the underside of the watch, near where the band connects to the case. Press and hold the button, then slide the band horizontally across and out of the slot — don’t pull it straight up (Apple Support).
If the band doesn’t slide out, Apple explicitly says to press the release button again and make sure you’re holding it down the entire time. A common mistake is tapping the button rather than holding it firmly while sliding the band (Apple Support).
Pro tip: The single most reliable fix for a stuck band is to hold the release button down firmly and slide the band out with even, steady pressure — not a yank. If it still won’t move, check whether you’re dealing with a third-party band that lacks the same release cutout.
To install the new band, slide it into the slot with the text facing you. Push it in until you feel and hear a click — that’s the spring-loaded mechanism engaging. Give the band a gentle tug to confirm it’s locked in place before flipping the watch over (Apple Support).
What to Do When a Band Gets Stuck
A stuck band is rarely a mechanical failure — it’s almost always a technique issue or a third-party compatibility problem. Apple’s troubleshooting guidance focuses on two things: pressing the release button correctly and checking the band’s alignment.
Press and hold the release button again. Apple’s official troubleshooting step is to press the release button once more and make sure you’re holding it down — not just tapping it (Apple Support).
Check the band orientation. If the band’s text is facing away from you, it may not align with the release mechanism, making removal harder. Apple’s guide says the band should be inserted with the text facing you — the same rule applies when removing it (Apple Support).
The key distinction here is between an official Apple band and a third-party one. Apple bands have a precise cutout that aligns with the release button. Third-party bands may vary slightly, which is why some users find them harder to remove. Apple Support Community users report that a gentle rocking motion at the base while holding the release button can help free a stuck band (Apple Support Community).
Can I Change My Apple Watch Band Every Day?
The short answer is yes — and Apple doesn’t discourage it. The band mechanism is designed for frequent changes, and the official instructions treat band swapping as a routine action, not a rare maintenance task. Apple’s guidance doesn’t mention any wear limits on the connection mechanism, and there’s no official warning about daily changes.
What Apple does emphasize is correct technique: don’t force the band, and make sure you feel the click when inserting. If you change bands daily, the main thing to watch is that the release button still moves freely and that the band seats flush against the watch case (Apple Support).
One thing to consider: some third-party bands may fit less precisely than Apple’s own bands, which could make daily swapping more tedious. Apple’s official bands are designed to exact tolerances, so if you plan to change straps every day, sticking with Apple bands or high-quality third-party options will give you the smoothest experience.
Apple Watch Band Release Button Location
Finding the release button is straightforward once you know where to look. The button is on the underside of the watch, near where the band meets the case. There are two release buttons — one for each band slot — positioned symmetrically on either side of the watch case (Apple Support).
The button is small and oval-shaped, slightly recessed into the case so it doesn’t get pressed accidentally during wear. You’ll feel it click when you press down — that’s the mechanism disengaging the band. Apple Support Community users confirm the location is consistent across all Apple Watch models, from Series 1 through the latest Ultra (Apple Support Community).
Some users press both buttons simultaneously, which isn’t necessary and can make removal harder. Release one side at a time, and the band will slide out cleanly.
Apple Watch Band Replacement Time and Styles
Apple offers a wide range of band styles, from the Sport Band to the Milanese Loop, and the replacement process is identical across all of them. No tools are required for any standard Apple band — the release mechanism is entirely manual.
| Attribute | Detail |
|---|---|
| Band release button location | Underside of the watch, one per band slot |
| Typical band replacement time | Under 30 seconds per band with proper technique |
| Tools required | None — all standard bands are tool-free |
| Official guidance source | Apple Support (tier-1) |
The table above reflects Apple’s official position — and the notable takeaway is that no tools are required for any standard band. The Link Bracelet is the exception, requiring the specialized release tabs built into the bracelet itself, but those are still tool-free (Apple Support).
Apple’s number one rule across all support documents is consistent: never force the band into the slot. If it doesn’t slide easily, something is misaligned or incompatible (Apple Support).
Apple says the new band should be inserted with the text facing the user. This isn’t just cosmetic — the orientation affects how the band’s cutout aligns with the release mechanism (Apple Support).
The click when inserting a band is the spring-loaded mechanism engaging. Apple describes it as audible and tactile — you’ll both hear and feel it. If there’s no click, the band isn’t fully seated (Apple Support).
support.apple.com, support.apple.com, discussions.apple.com, discussions.apple.com, support.apple.com, slashgear.com, imore.com, discussions.apple.com, esrtech.com
Frequently Asked Questions
Is it okay to change my Apple Watch strap every day?
Yes — Apple’s official guidance doesn’t mention any wear limitations on the band mechanism, and the instructions treat band swapping as a routine action. The mechanism is designed for regular changes, so daily swapping is fine as long as you use correct technique (Apple Support).
What should I do if my band is stuck?
Press and hold the release button again, making sure you’re holding it down fully. If it still won’t move, check whether the band is a third-party model with a cutout that doesn’t align perfectly with Apple’s release mechanism. Apple Support Community users also suggest a gentle rocking motion while holding the release button (Apple Support; Apple Support Community).
How do I know if my new band is installed correctly?
Apple’s official guidance says the new band should be slid in until you feel the click. The click is the spring-loaded mechanism engaging — you’ll both hear and feel it. Give the band a gentle tug to confirm it’s locked in place (Apple Support).
Does band orientation matter when installing?
Yes. If the band’s text is facing away from you, the band’s release cutout may not align with the watch’s button mechanism. Apple’s guide says the text should face you when inserting — this is Apple’s official guidance (Apple Support).
Where is the band release button on my Apple Watch?
The release button is on the underside of the watch, near where the band connects. There are two — one for each band slot — positioned symmetrically on either side of the watch case (Apple Support).
What happens if I force a band into the slot?
Forcing a band can damage the watch case or the band itself. If a band’s cutout doesn’t align with the release button, it could scratch the watch case or fail to seat properly. Apple’s guidance is clear: never force a band — if it doesn’t slide easily, something is wrong (Apple Support).
The Apple Watch band mechanism is deceptively simple — but its simplicity depends on one thing: correct technique. Apple’s official guidance is clear that the system works reliably when you hold the release button down fully, slide bands straight out, and never force anything into the slot. The result is a process that takes under 30 seconds per band and lets you swap styles as often as you like.
Related reading: Do Not Disturb iPhone: What Happens When It’s On — a practical guide to managing notifications on your iPhone.
More related posts
 Heat Pump Installation Christchurch – 2025 Costs & Top Installers
 I Thank God Lyrics: Original Version & Misattributions
 Latest Death Notices in The Press: Recent Obituaries Today
 What Is Provisional Tax – NZ Guide to Payments Dates Methods
 Trade Me Value My Car: Free NZ Car Valuation Guide
 Bay of Plenty Times Death Notices: Past 30 Days
 Why Is My Vagina Itchy? Causes, Relief & When to Worry